Introduction
PlugXR Creator is an unbelievably easy-to-use Augmented Reality builder equipped with powerful features to Create & Publish advanced AR Apps and Experiences into WebAR, white-labeled App on Android & iOS or in the PlugXR App with absolutely NO Coding or Dependency.
PlugXR’s AR Tool is an advanced grid that allows you to create immersive and advanced AR Experiences. Let’s have a look at how we can use the grid to its maximum potential.
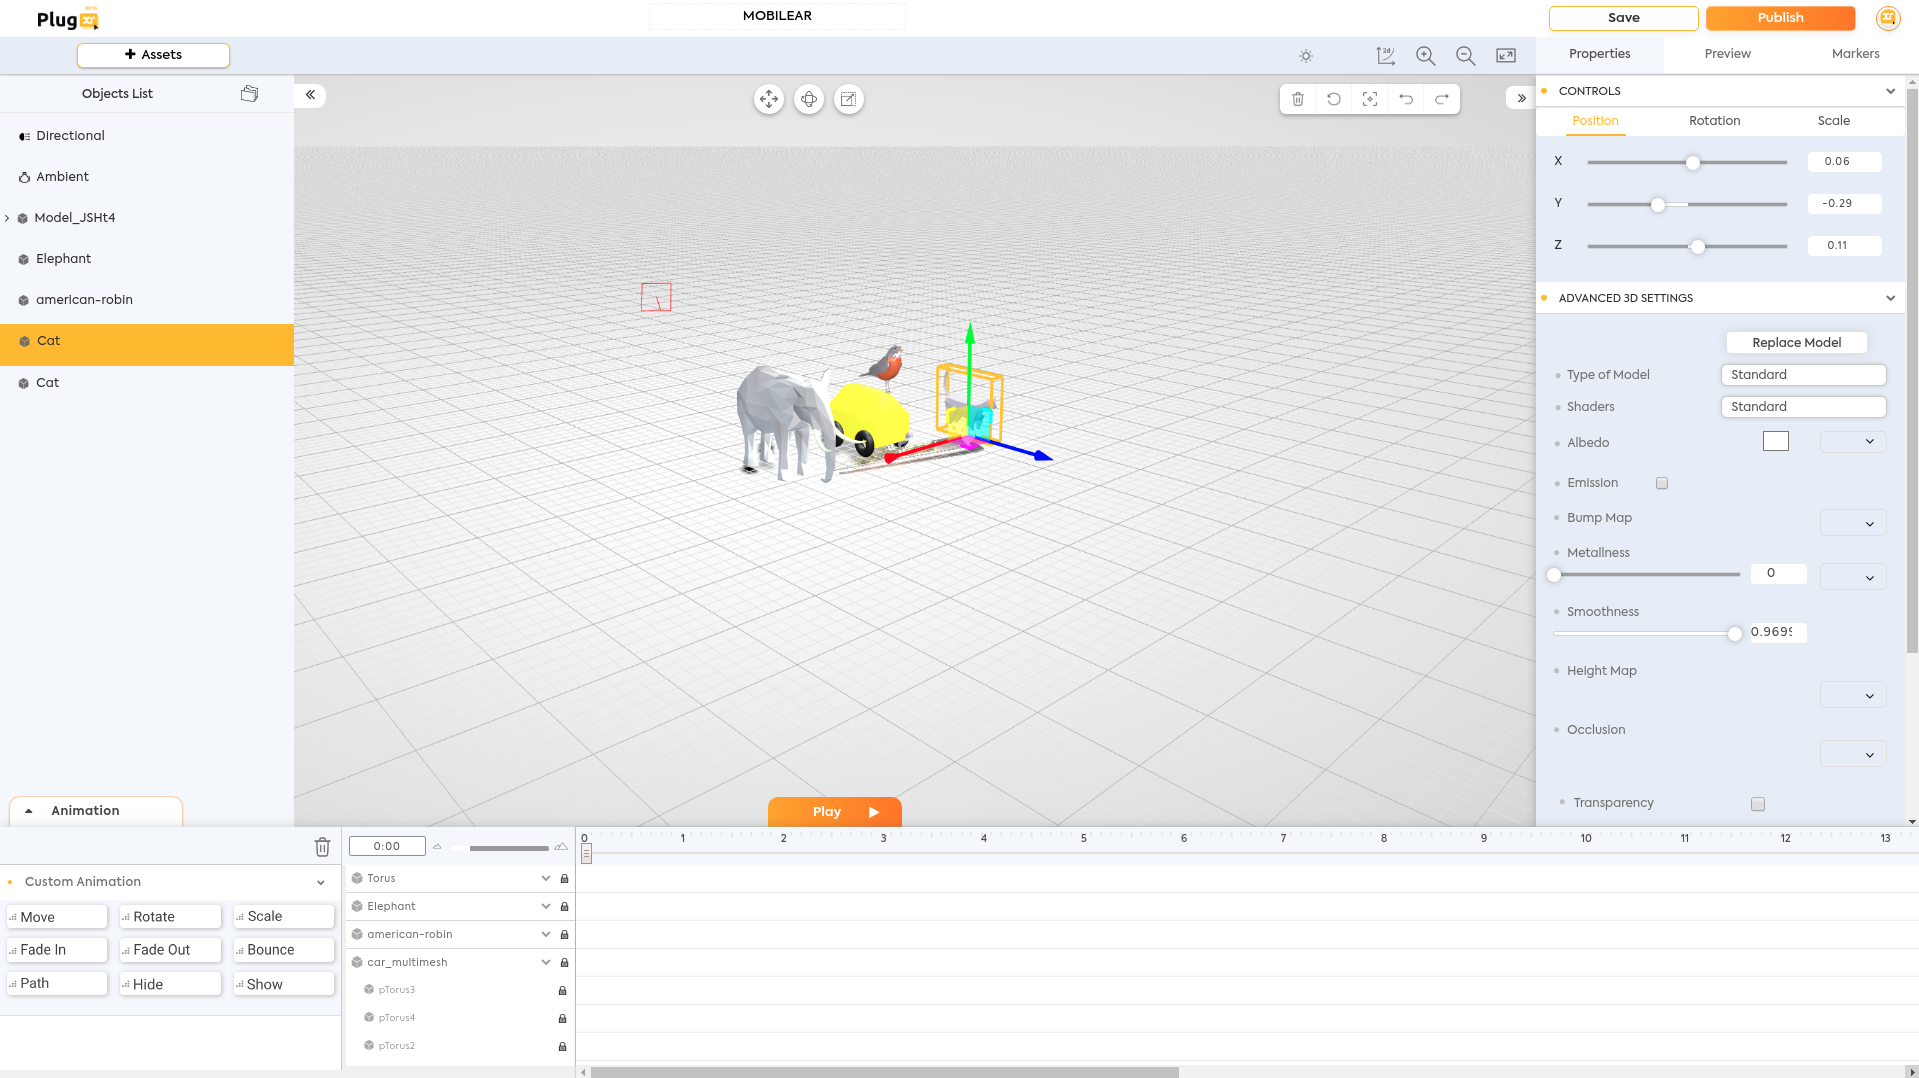
OBJECT PROPERTIES
- CONTROLS
- Position (X, Y, Z)
This feature enables the movement of the object across the grid by using the X (sideways), Y(front and back), and Z(up and down) slide-bars or by entering a specific value in the box provided on the right side of each option.
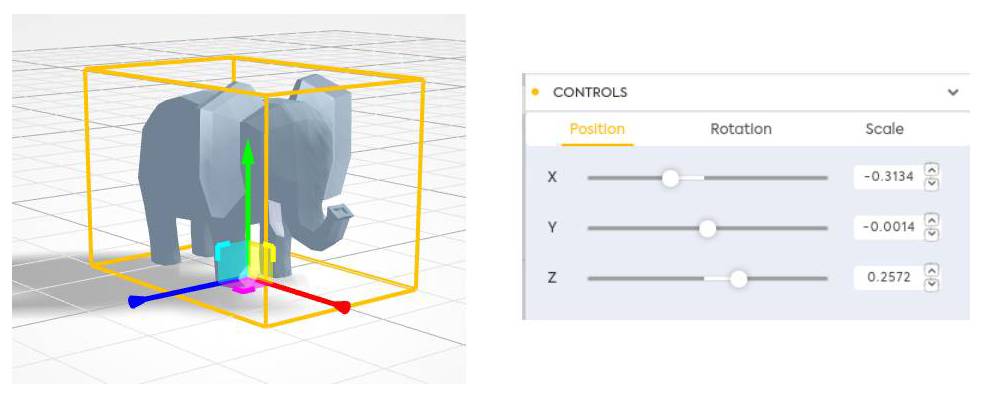
- Rotation (X, Y, Z)
This feature enables rotation of the object around its axis in three verticals namely X (rotation in the front), Y (rotation on the sides), and Z (rotation across the axis) slide-bars or by entering a specific value in the box provided on the right side of each option.
- Scale (X, Y, Z)
This feature enables scaling the size of the asset by using the verticals X (scaling on X-axis), Y (scaling on the Y-axis), and A (Aspect Ratio enables overall scaling in size of the asset) slide-bars or by entering a specific value in the box provided on the right side of each option. 3D Models have an additional vertical “Z” for scaling the Model in the Z-axis.

- Opacity
This feature allows you to adjust the transparency of the object by using the slide-bar or by entering a specific value in the box beside it.
- Position (X, Y, Z)
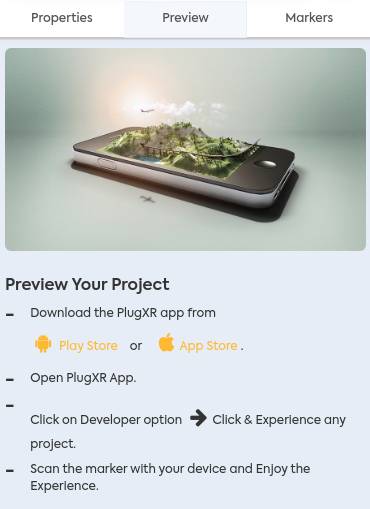
- MARKER PREVIEW
This option is available in the Asset Modifier Section on the right side of the grid and will guide you on how to Preview your Project on the PlugXR App.
- Marker View Method
Follow these tips to get a seamless tracking of the Marker to show your AR Experience without any hassle.
- Ensure that your Marker is rated 4 or above to get the best recognition. Complex images with a lot of contrast tend to work very well as compared to flat and monochromatic images.
- Avoid reflection of light upon the Marker to avoid flickering of the AR Experience.
- Place the marker not too far away and at a 45-degree angle or parallel to the device camera to instantly recognize the marker.
- Ensure that the entire marker is being covered in the device camera.
- Ensure that there is enough background light for the camera to detect the marker.
- Marker View Method
- Markers List
This option is available in the Asset Modifier Section on the right side of the grid and will allow you to Add more Markers for new AR Experiences within the same app.
EVENTS
- Add Events
This option is available below Advanced Settings in the Asset Modifier Section on the right side of the grid and will allow you to add customized events to your AR Experience. Upon clicking “Add Action”, a pop-up opens with the following options:
-
Select Event
- Single Tap
- Double Tap
- Long Press
- Swipe up
- Swipe Down
- Swipe Left
- Swipe Right
- Pinch In
- Pinch Out
-
Select Object Type
- Self Object
- Parent Object (3D)
- Child Object (3D)
- Other Object
- Self Object
- Select Event Action
- Animation Play
- Animation Pause
- Fade In
- Fade Out
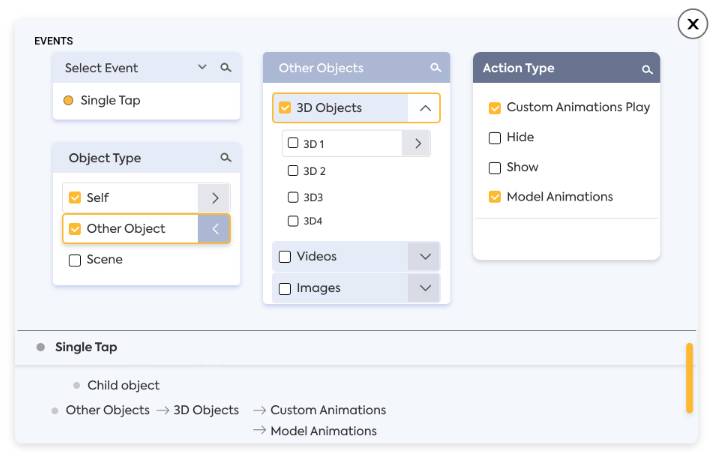
For instance, if you wish to play animation for the 3D Model after a single tap on AR Experience, click on the Model> Events> Add Action> Select Event> Single Tap> Select object> Self/Parent> Select Event Action> Play Animation.
GRID OBJECTS
The top left side of the grid contains the Objects List. This slide-option allows you to see the various objects that are present upon the marker. It also helps you see the ‘child’ animations within the ‘parent’ model when the parent model is clicked upon. This will let you choose the desired object along with its ‘child’ animations without confusion.
- Group
You could group 2 or more objects together by clicking on the “file icon” beside “Object List Header” or by clicking on the 3 tiny dots beside each object and selecting “Group”.
-
Ungroup
You can ungroup the objects that have been grouped together by clicking on the 3 tiny dots beside any grouped object and selecting “Ungroup”.
-
Delete
The 3 small dots beside each object will help you Delete the selected object.
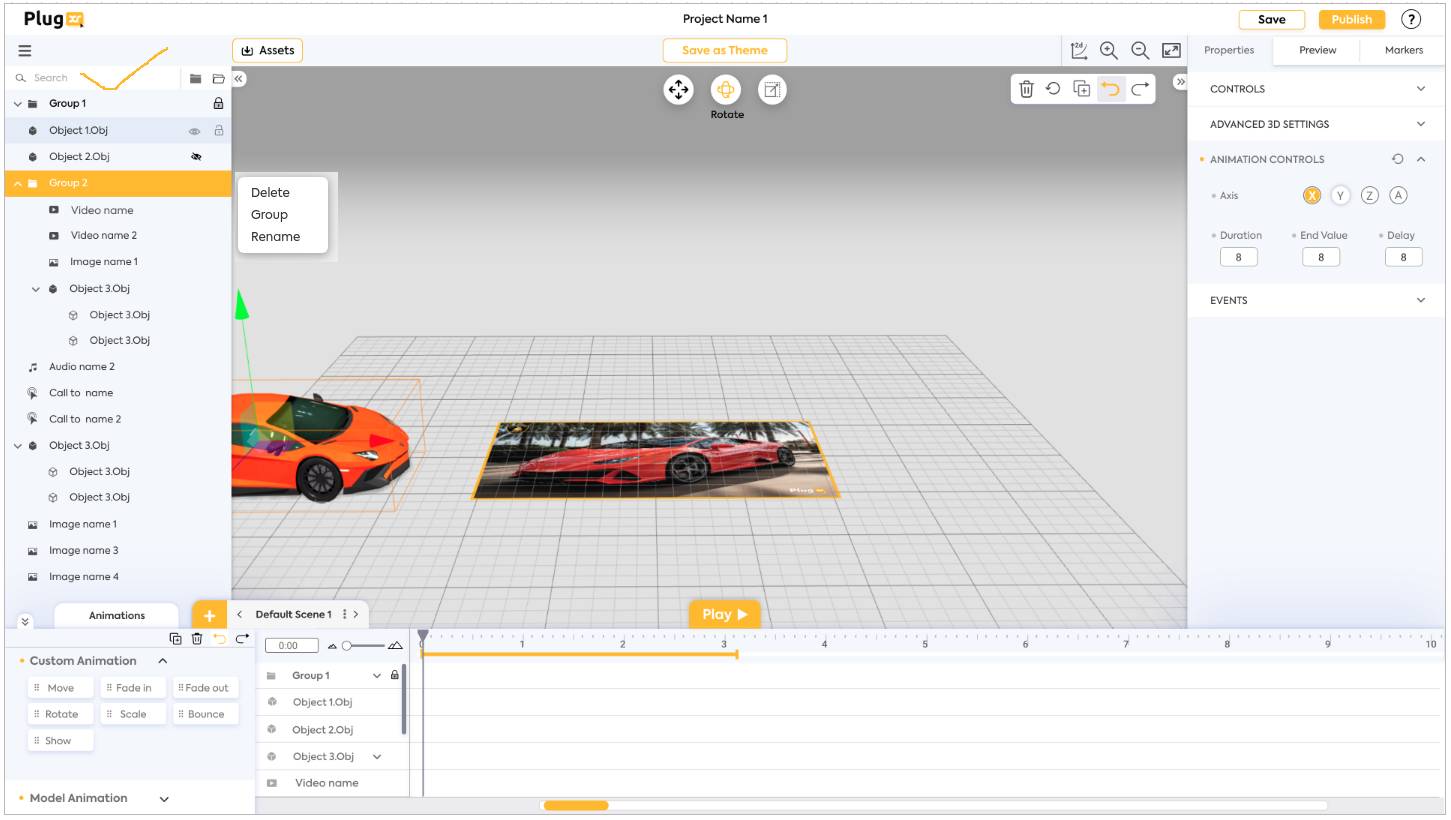
GRID CONTROLS
The grid has buttons within it to enable easy and comfortable creation of AR Experiences.
- Move Objects
This option will help you move the chosen object to the desired position.
-
Rotate Objects
This option will help you rotate the chosen object on the central axis until you get the desired rotation.
-
Scale Object
This option will help you scale the chosen object by either making it bigger or smaller.
You could also Move, Rotate and Scale the object by clicking upon it and dragging the Transform Controller (red, green, and blue lines on all 3 dimensions) till the model is in the desired position. The white part at the center of the axis will enable movement of the object in all 3 dimensions simultaneously. Clicking on the yellow, light blue, and pink squares between 2 colored lines will allow you to move the object in the respective 2 dimensions simultaneously.
-
Video Play/Pause
-------
-
2D/3D View
This feature helps you view your AR Experience in 2D (top view) or 3D (original) view.
-
Zoom In View
This button helps you zoom into the grid. You could zoom into the grid by scrolling-up with the mouse wheel as well.
-
Zoom Out View
This button helps you zoom out of the grid. You could zoom out of the grid by scrolling-down with the mouse wheel as well.
-
Full Screen
This button will help you view the entire grid in full screen while the controls within the grid will still be available for use.
-
Delete
This option lets you delete the selected object from the scene.
-
Reset
This option helps you reset the changes made in the position of the selected object to the original values.
-
Focus
This feature lets you focus on the selected object from a top view perspective.
-
Center
This feature lets you re-centre the focused view from the selected object back to the original view.
-
Lights
- Directional Light
- Point Light
- Spot Light
- Default Lights
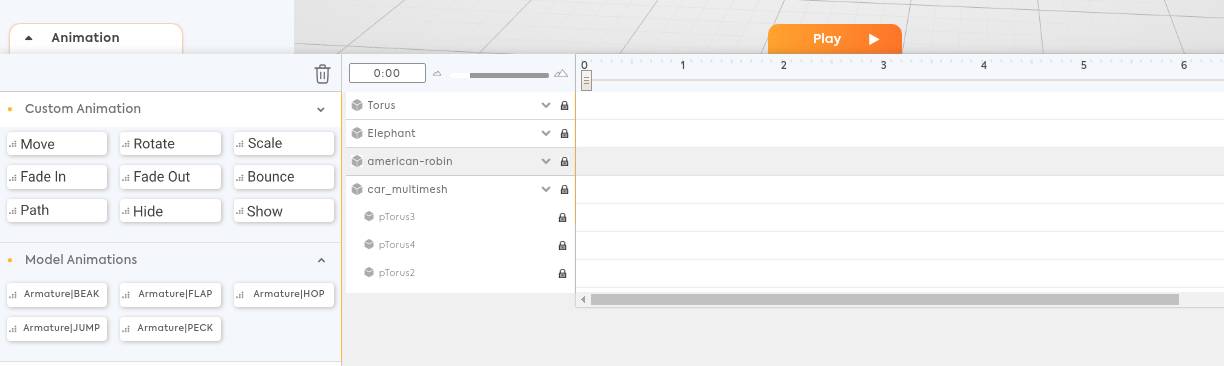
ANIMATION
- Custom Animations
This option will let you add customized animations to the selected models.
- Move
- Rotate
- Scale
- Fade In
- Fade Out
- Bounce
- Hide
- Show
- Path
- Add/Remove Nodes
- Path Settings
- Loop/Once
- Duraton
- Delay
-
Model Animation
Play in-built animations in your 3D Models with the Model Animations feature available below the Custom Animations option.
-
Delete Animation
You can delete a particular animation by selecting the yellow tab on the right side of the animation section and clicking the DELETE button available on top of the Custom Animations tab.
SAVE
This option is available on the top right corner of the grid page. This will let you save the progress and changes when clicked upon.
PUBLISH
This option is available on the top right corner of the grid page. This will let you publish your AR Experience in either the PlugXR App, WebAR or in a white-labeled application on Android & iOS based on where you have chosen to publish your AR Experience.
While creating an AR App for the first time, the “Publish” button is replaced with the “App Setup” button. This will redirect you to a page that will help you set up the app for Android and iOS within the platform itself.