ASSETS
Choose what will be shown on the AR Experience either from our Assets Library or by uploading your own content by clicking on “Assets” on the left top corner of Sub-Header Menu. The pop-up shows you a plethora of assets that you can choose from or upload your content in the allocated slot on the right side of the pop-up. If your assets are not in the supported format, use our Assets Converter (right-bottom of the pop-up) to optimize your assets to PlugXR Supported Format.
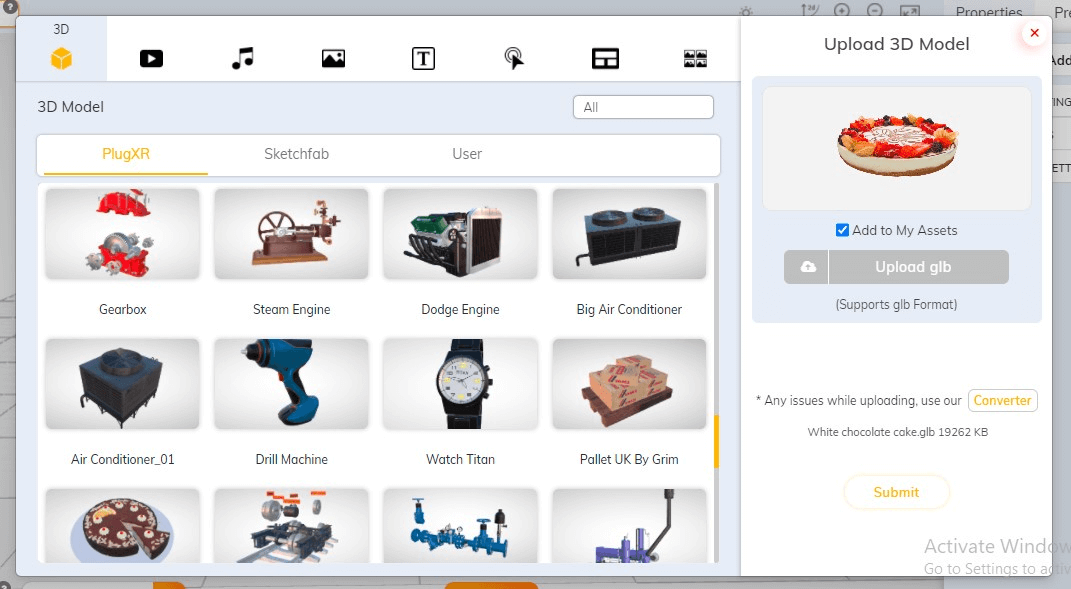

3D MODELS
- 3D models library
PlugXR Assets Library contains 3D Models that are native to PlugXR as well as 3D models from Google Poly and SketchFab.
- Upload model
3D Models uploaded by the user will be shown under the User tab in 3D Assets. 3D Models uploaded should be in .glb format (use Converters) and should not exceed 10MB for the best AR experience.
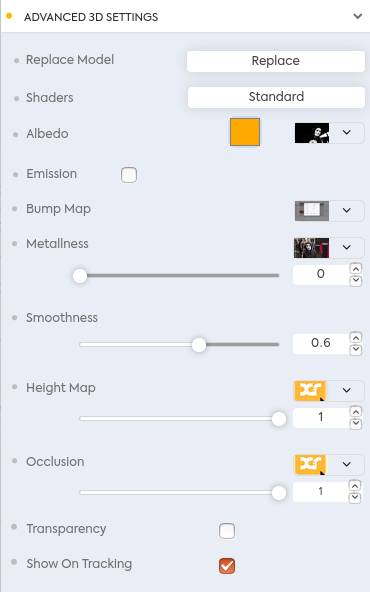
- Advanced 3D Settings
This option is available in the Asset Modifier Section when a 3D Model is uploaded upon the grid.
- Shaders Type
The platform currently has the standard shader that can be used for any 3D model
- Properties
- Albedo
Albedo adjusts the overall brightness of a 3D Model by altering a sum of diffuse, reflective, refractive and translucent components. The colored box will help you choose from a wide range of colors.
- You could upload the Albedo texture file for that particular Model.
- or
- Upload a link (For Instance: https://www.plugxr.com/filename.png) along with the extension
in the slide-down option on the extreme right-side of albedo option.
- Emission
The Emission properties control the color and intensity of light that the surface of a Material emits. Checking the box beside Emission will enable the advanced emission options. The colored box will help you choose from a wide range of colors.
- You could upload the Emission texture file for that particular Model.
- or
- Upload a link (For Instance: https://www.plugxr.com/filename.png) along with the extension
in the slide-down option on the extreme right-side of Emission option.
- Bump Map
Bump maps are grayscale images that allow you to fake detail in 3D objects without changing the actual 3D geometry in any way.
- You could upload the Bump map texture file for that particular Model.
- or
- Upload a link (For Instance: https://www.plugxr.com/filename.png) along with the extension
in the slide-down option on the extreme right-side of bump map option.
- Metalness
Metalness can be used to define the bare metal texture of your 3D Model (or part of it). You can adjust the Metalness of the Model by either adjusting the slide-bar or entering particular values in the box beside it.
- You could upload the Metalness texture file for that particular Model.
- or
- Upload a link (For Instance: https://www.plugxr.com/filename.png) along with the extension
in the slide-down option on the extreme right-side of albedo option.
- Smoothness
Smoothness helps you add a variety of smoothness levels across the surface of the 3D Model. You can adjust the Smoothness of the Model by either adjusting the slide-bar or entering particular values in the box beside it.
- You could upload the Smoothness texture file for that particular Model.
- or
- Upload a link (For Instance: https://www.plugxr.com/filename.png) along with the extension
in the slide-down option on the extreme right-side of Smoothness option.
- Height Map
Height Map uses a certain texture to cause an effect where the actual geometric position of points over the textured surface is displaced, resulting in height and depth changes in the 3D Model.
- You could upload the Height Map texture file for that particular Model.
- or
- Upload a link (For Instance: https://www.plugxr.com/filename.png) along with the extension
in the slide-down option on the extreme right-side of Height Map option.
- Occlusion
Occlusion is a shadowing technique used to make 3D objects look more realistic by simulating the soft shadows that should naturally occur when lighting is cast out onto the scene.
- You could upload the Albedo texture file for that particular Model.
- or
- Upload a link (For Instance: https://www.plugxr.com/filename.png) along with the extension
in the slide-down option on the extreme right-side of Occlusion option.
- Albedo
- Shaders Type
- Transparency
Transparency helps in altering the opacity of the 3D Model from transparent to opaque. Transparency of the Model can be enabled by clicking on the box beside it.
- Show on Tracking
When this option is kept unchecked then the object won’t be visible in the grid. By default this option is kept checked.
- Save and Submit
Save the changes that have been applied to the 3D Model.
- Edit/Replace Model
Replace the selected 3D Model with another Model from the assets or by uploading your own Model.
- 3D Converters
3D Converters are available below in the same pop-up where you can upload 3D Models of your own and will help in converting your 3D Model into .glb format without any hassle.
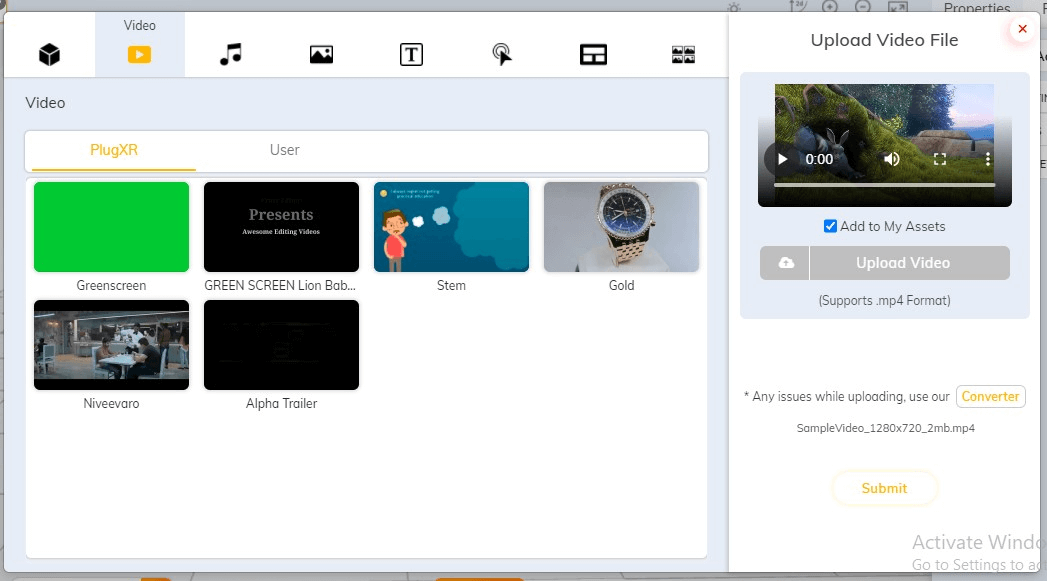
Videos
PlugXR Assets Library contains Videos created by PlugXR, and from sources like Pexels and Pixabay.
Upload VideoVideos uploaded by the user will be shown under the User tab in 3D Assets. Videos uploaded should be in mp4 format (use Converters) and should not exceed 5MB for the best AR experience.
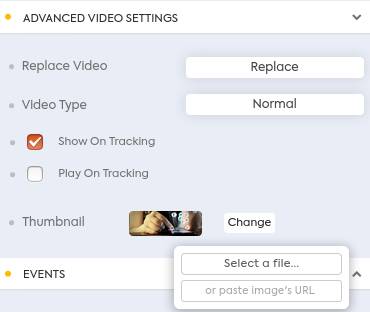
Advanced Video Settings
- Video Replace
This will help you replace the video with any other video of your choice.
- Thumbnail Replace
This feature will help you change the thumbnail on the video.
- Video Converters
Video Converters are available below in the same pop-up where you can upload Videos of your own and will help in converting your Video into mp4 format without any hassle.
- Video Controls
- Show on tracking
- Play on Tracking
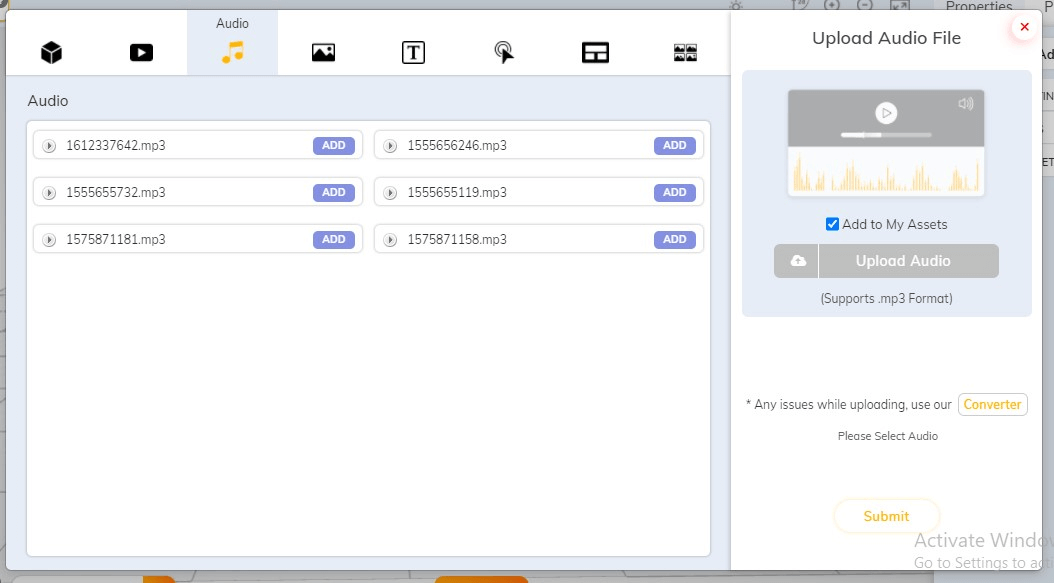
AUDIO
Add Audio to your AR Experience by choosing an Audio file from the PlugXR Audio Library.
Upload AudioAudio files uploaded by the user will be visible to only the user in the same category. Audio uploaded should be in mp3 format (use Converters) and should not exceed 2MB for the best AR experience.
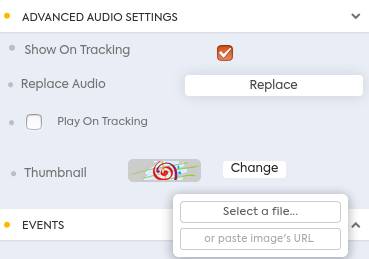
Advanced Audio SettingsThis option is available in the Asset Modifier Section on the right side of the grid when an Audio clip is uploaded upon the grid.
- Replace Audio
This will help you replace the Audio with any other audio of your choice.
- Thumbnail Change
This feature will help you change the thumbnail on the audio.
- Show on tracking
When this option is kept unchecked then the object won’t be visible in the grid. By default this option is kept checked.
- Play on Tracking
When this option is kept checked then it will play the audio track. If kept unchecked then it will not play the audio track.
- Audio Converters
Audio Converters are available below in the same pop-up where you can upload Audios of your own and will help in converting your Audio into mp3 format without any hassle.
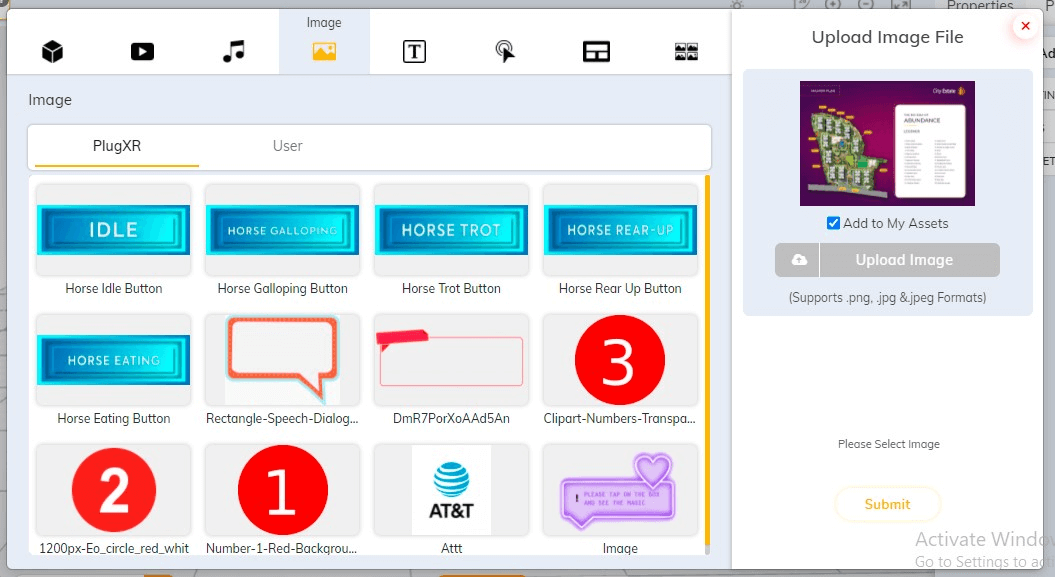
IMAGES
This will help you replace the Image with any other image of your choice.
Image LibraryPlugXR Assets Library contains Images that are native to PlugXR and images from renowned platforms like Pexels & Unsplash.
Upload ImageImages uploaded by the user should be in .jpg, jpeg, or png format and can be found in the User tab in Images.
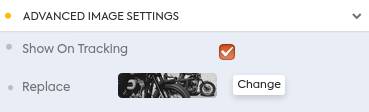
Advanced Image Settings- Show on tracking
When this option is kept unchecked then the object won’t be visible in the grid. By default this option is kept checked.
- Replace Image
This will help you replace the Image with any other image of your choice.

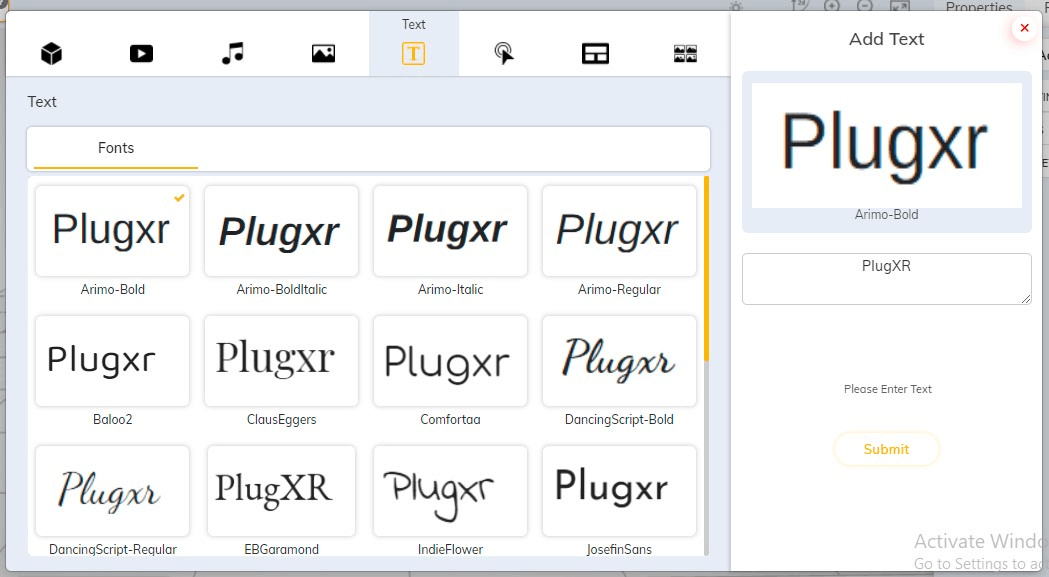
TEXT
Add any text on your AR Experience by clicking on the “Text” option within the pop-up.
Advanced Text Settings- Text Settings
- Font Family
Choose from a range of fonts for the text.
- Font Color
This helps in changing the color of the text from a wide range of color palettes.
- Font Size
Adjust the size of your text by entering a particular value in the box provided.
- Font Family
- 3D Text Settings
- Font Height
Customize the height of texts by entering a particular value in the box provided.
- Curve Segment
Curve Segments enables you to curve the text to desired positions, thereby forming a customized font by entering a particular value in the box provided.
- Bevel Size
Add bevel effect by entering a particular value in the box provided to add 3D depth to the text by making its edges appear sloped.
- Metalness
This feature lets you add a metallic finish to your text by entering a particular value in the box provided.
- Smoothness
This feature lets you add a variety of smoothness levels across the surface of the text by entering a particular value in the box provided.
- Font Height
- Save and Submit
This option helps you Save the changes that have been made to the text and Submit it to the grid.

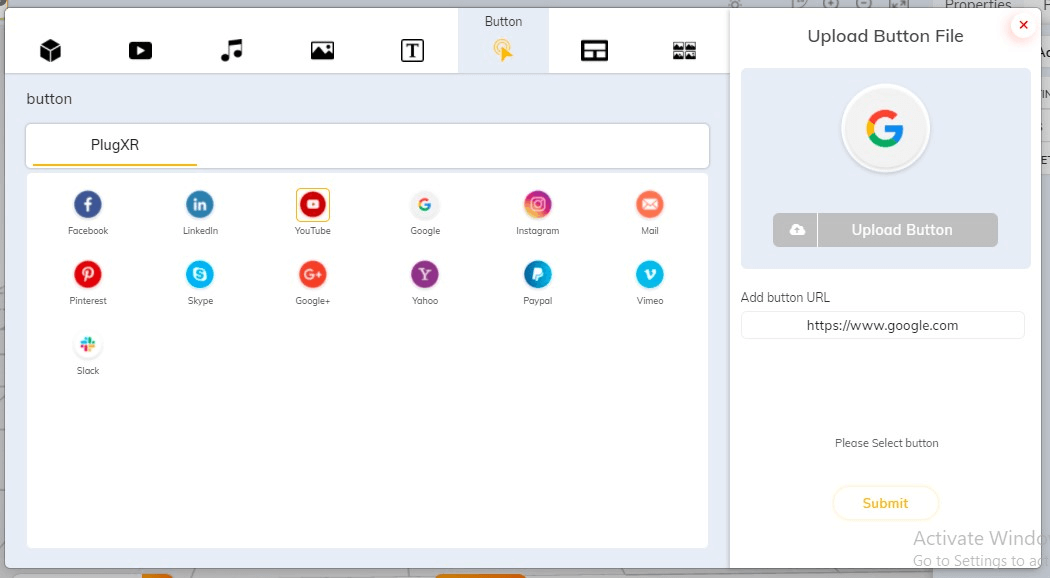
BUTTONS
Drive traffic to your website or social media profile by enabling customized Call-to-Action buttons on your AR experience through the “Buttons” tab in Assets. The link provided should be in the given format: https://www.plugxr.com
Advanced Button SettingsThese advanced button settings will help in customizing the link and outlook of the button on your AR Experience.
- Change Button URL
This will allow you to change the URL link for the given button. The link provided should be in the given format: https://www.plugxr.com
- Add Button Thumbnail
This will allow you to change the Icon for the given button.
- Manual Thumbnail Update
- URL Thumbnail Update
This option helps you Save the changes that have been made to the Buttons and Submit it to the grid.